F-117
Kit : Revell Germany (No: 4382)
Scale : 1/72
I bought this kit a long time ago, glued in the cockpit tub, wings to the upper body and then forgot all about it.
Recently, I decided that I had enough of partially building kits and then abandoning them for newer kits, and I just had to finish *something* ! This kit being simple, it was my first choice (little did I know what I was getting into).
Looking again at the kit, I had to groan. I had three choices:
- Throw it in the bin immediately (yes, it was that bad)
- Build it as it is and then give it to somebody who wouldn't know the difference
- Correct as many of the problems as I could.
I decided on the second choice. I certainly wasn't going to waste any time on such a bad kit.
Let us start with the problem areas. First, the dimensions are all wrong. Can't do anything about that.
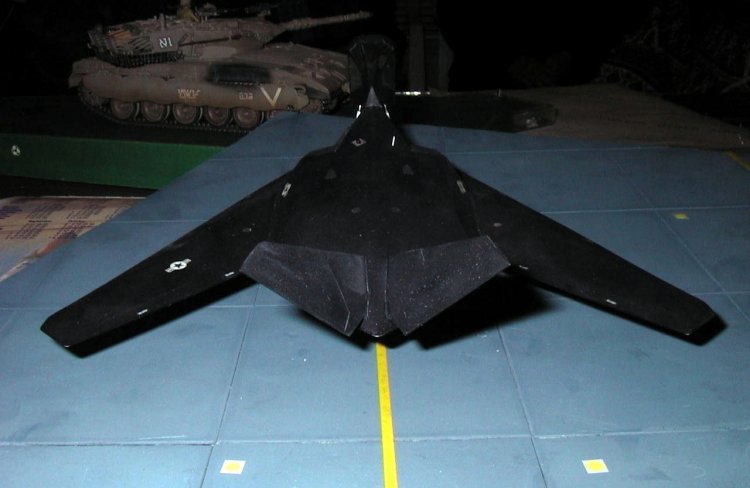
Fuselage: There are angles (inward inclined plates) on the side of the fuselage which shouldn't be there.
It seems to be a simple job to put a triangle of plastic sheet to cover it.
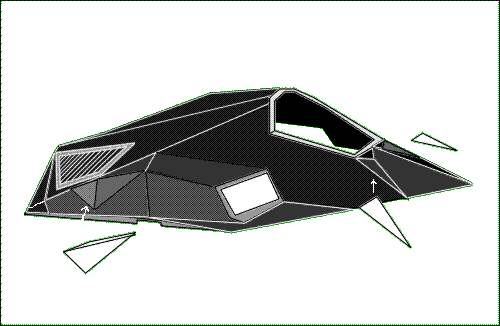
I didn't take any in-progress pictures, so this drawing has to do instead.
The nose area had the same problem. There are indentations on the front, where it should simply be flat.
Same easy solution (did I say I wasn't going to waste any time on this kit?)
Exhausts: where the very distinctive exhausts should be, there are what look like flaps. Above them are what I suppose are exhaust louvers. Hummmmmm. OK, puttying over them shouldn't be so difficult. Do I open-up the exhausts? Yes ! Well, there go the flaps. But it looks empty without those vertical diffuser plates, or whatever they are called. Do I make them? Well, OK, it will take some time, but I'm sure they will look nice. Some thin plastic sheet cut in thin stripes should do the job. (OK, OK, so I AM wasting some time on this kit.)


Underside: What can I say? It is totally flat. To correct that, I may as well
scratchbuild the whole plane, so forget it. But the wheel bays definitely need to be corected;
they are just rectangular openings (there is some fictitious hydraulic line detail in there)
First cover the rectangular openings with 0.5 mm sheet, then carve correctly shaped openings in it,
and then scratchbuild the gear doors (with the sawtooth edges, of course). The nose gear
strut is in the middle of the bay, supposedly retracting backwards. The shape it is in, it wouldn't
fit either backwards or forwards, unless the main strut hinges move during retraction as well. Not too
difficult to cut off the retraction strut, move the main strut backwards, and glue the retraction strut
in front of it. I made some brake lines and elecrical wires out of stretched sprue, just to improve the look,
even though the landing gear didn't look like the real thing at all.
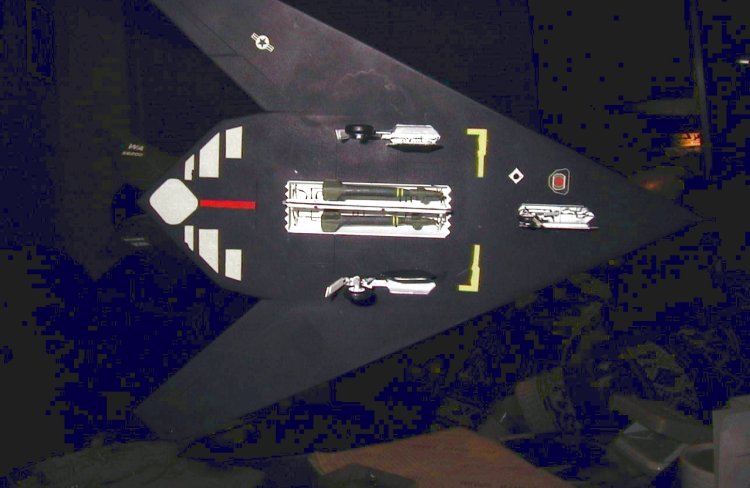 Next step, the bomb bays. The bomb bay is too narrow, and too long. Also, the bay doors are rectangular,
with no sign of the characteristic sawtooth edges. In addition, Revell has provided two Mavericks, to be
installed in the middle of the bomb bay, with the doors attached to the sides of the bomb bay, instead of
the middle. There are four bomb (or missile) carriers, two extended, and two retracted (totally ficticious,
of course). I first made some sort of framework in the centre of the bay, so I could attach the doors.
Not having any details, I just made them up. Then, I cut-off a length of the doors, and glued them over the
aft part of the bay, to make it as close to the actual size as possible. I did sawtooth edges here, on the
doors themselves, as well as at the front of the bomb bay. I then drilled new holes for the bomb carriers
and attached them (one extended and one retracted on each side of the framework.
Next step, the bomb bays. The bomb bay is too narrow, and too long. Also, the bay doors are rectangular,
with no sign of the characteristic sawtooth edges. In addition, Revell has provided two Mavericks, to be
installed in the middle of the bomb bay, with the doors attached to the sides of the bomb bay, instead of
the middle. There are four bomb (or missile) carriers, two extended, and two retracted (totally ficticious,
of course). I first made some sort of framework in the centre of the bay, so I could attach the doors.
Not having any details, I just made them up. Then, I cut-off a length of the doors, and glued them over the
aft part of the bay, to make it as close to the actual size as possible. I did sawtooth edges here, on the
doors themselves, as well as at the front of the bomb bay. I then drilled new holes for the bomb carriers
and attached them (one extended and one retracted on each side of the framework.
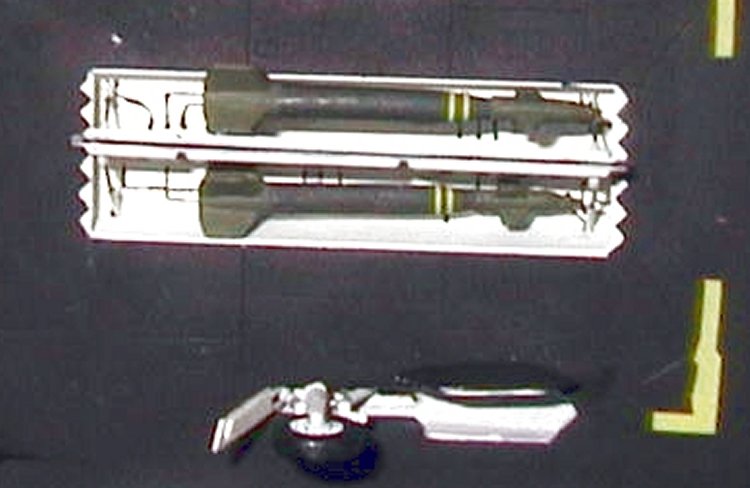
I didn't want to put the Mavericks in here, as I've never seen this plane carrying any Mavericks, and I didn't
want to waste any of the GBU's I had from the Hasegawa Wapon Set into this, so I put in a couple of GBU's
(I couldn't determine their type) from my HobbyCraft A-10. They were pretty badly shaped oval cross sectioned
things, but who's going to see them?
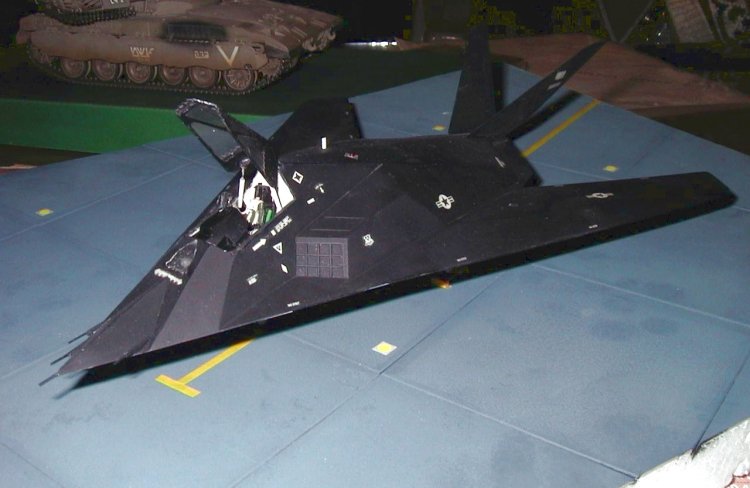
Then, I took two different diameter syringe tips, and made them into hydraulic door retractors (they can barely
be seen in the picture below).
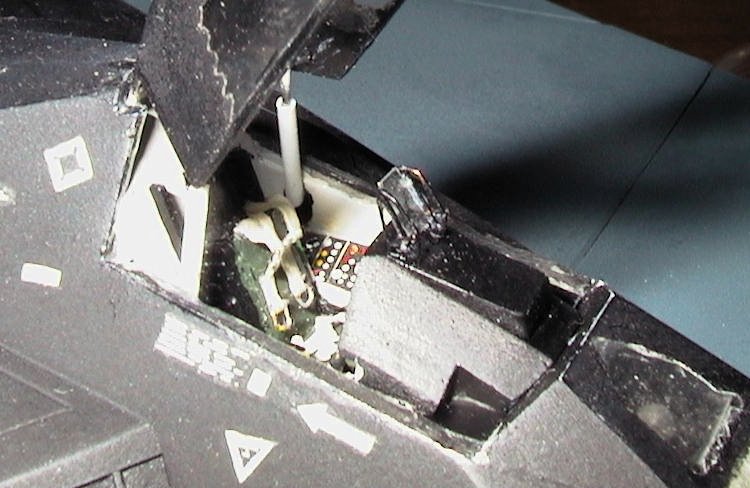
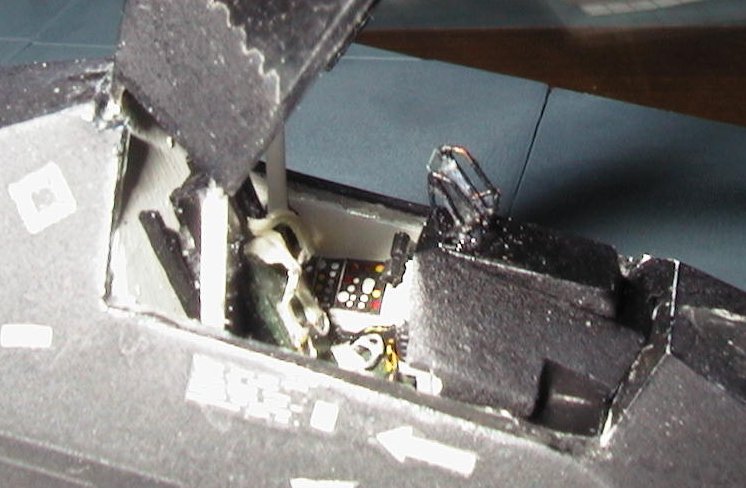
Cockpit: Since I wasn't going to waste any time on this plane, I certainly wasn't going to do
anything at all in the cockpit. But, while test fitting the canopy, I noticed how much clear space
there was. The insides were going to be so visible. OK, so I started to modify the ejection seat, so that it
"looked" like an ACES seat. While I was doing that, I thought: "Why not do some more?" So I made seat belts
and buckles out of masking tape and tiny strands of wire. They look too big for the scale, but I couldn't make
any smaller.
 |
 |
 |
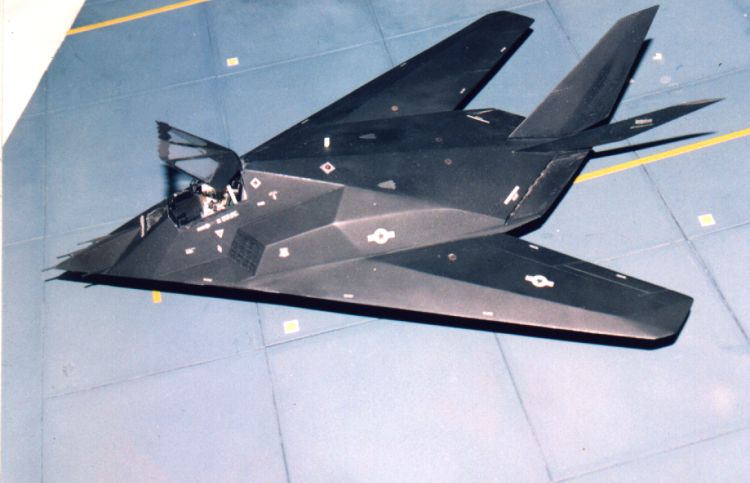
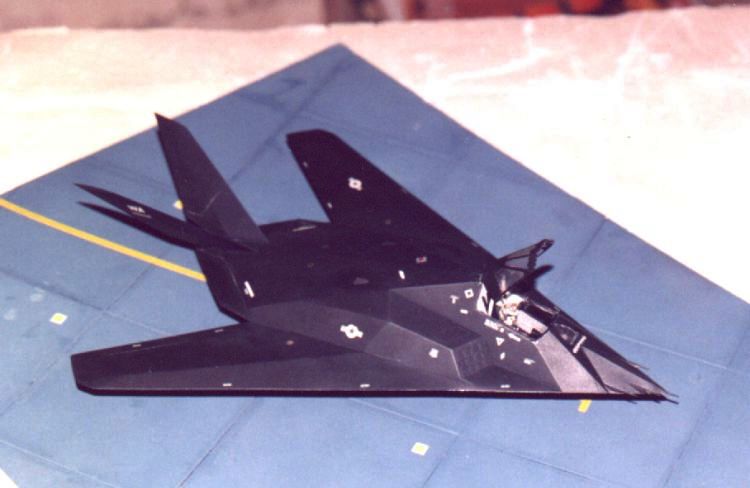
Painting and Decals: I painted the plane with Humbrol Coal black, then covered it with Tamiya Clear.
Aaaaaaaaaaarrrrrrrgggggggggggghhhhhhhhh. All I got was a dusty white coating on my paint. Back to square one.
I removed the clear, which took with it a good deal of the black too. I re-painted, and this time, coated it with
Humbrol clear. I guess I didn't do a good coat, as the decals still silvered. But they were wrong in every aspect
anyway, so I didn't care very much. After they dried, I coated with Testors dullcoat,
As a finishing touch, I added red painted transparent sprues on the top and bottom, as well as an antenna, and
that's the end of my F-117 adventure. But I can't deny I had fun while doing it.